Smart Campaigns
To create smart campaigns in our GoZen Growth, follow these steps:
1. Navigate to the "Smart Campaigns" section in the dashboard. This is where you can manage all your smart campaigns.
2. In the Smart Campaigns section, you will find two options to create smart campaigns: "Create with AI" and "Create Manual Campaigns".
3. If you choose to create a smart campaign with AI, click on the "Create with AI" option. This will open a new window or prompt where you can input the necessary details.
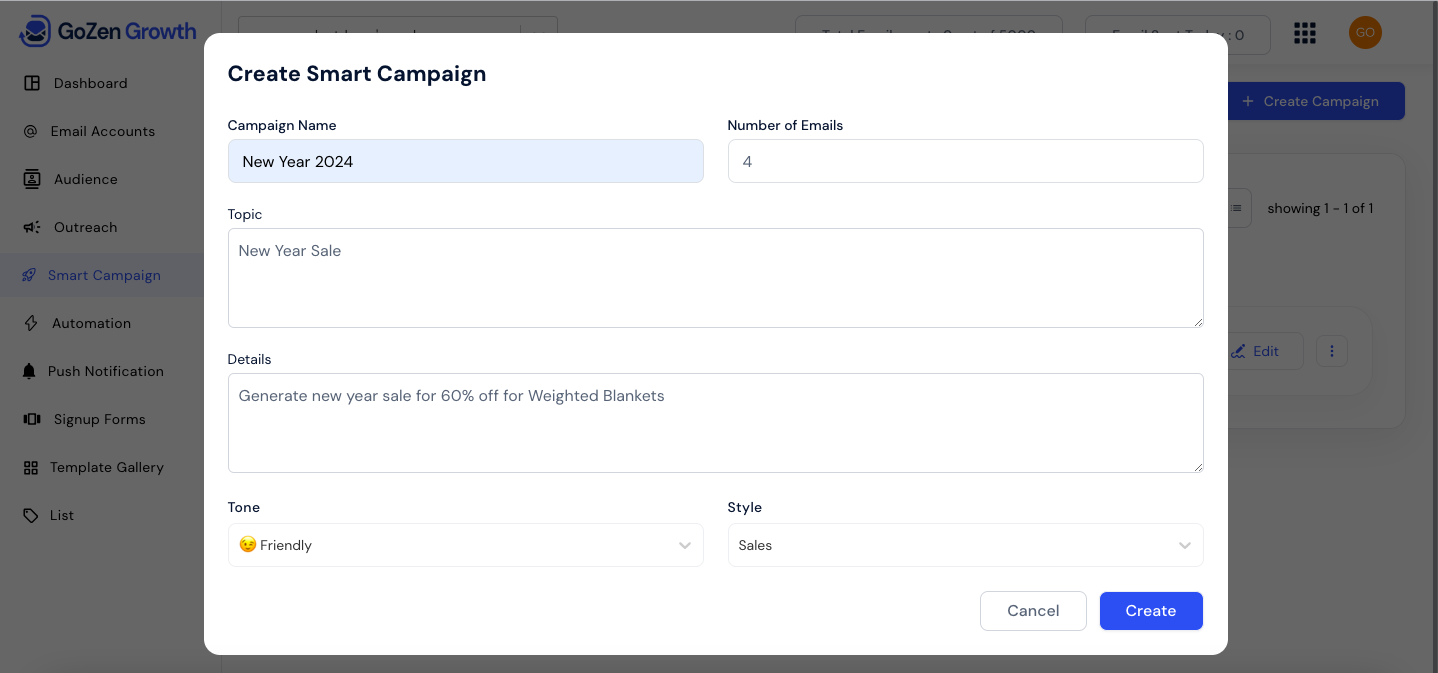
4. In the AI campaign creation window, you will be asked to provide the following information:
a. Campaign Name: Enter a unique name for your campaign. This will help you identify and manage your campaigns easily.
b. Number of Emails: Specify the number of emails you want the AI to generate for your campaign. This can be adjusted based on your requirements.
c. Email Topic: Provide a brief description or topic for the emails that you want the AI to generate. This will help the AI understand the context and generate relevant content.
d. Detailed Description: Enter a detailed description of the email content you want the AI to generate. Be as specific as possible to ensure accurate results.
5. Once you have provided all the necessary information, click on the "Generate" or "Create" button to initiate the AI campaign creation process.
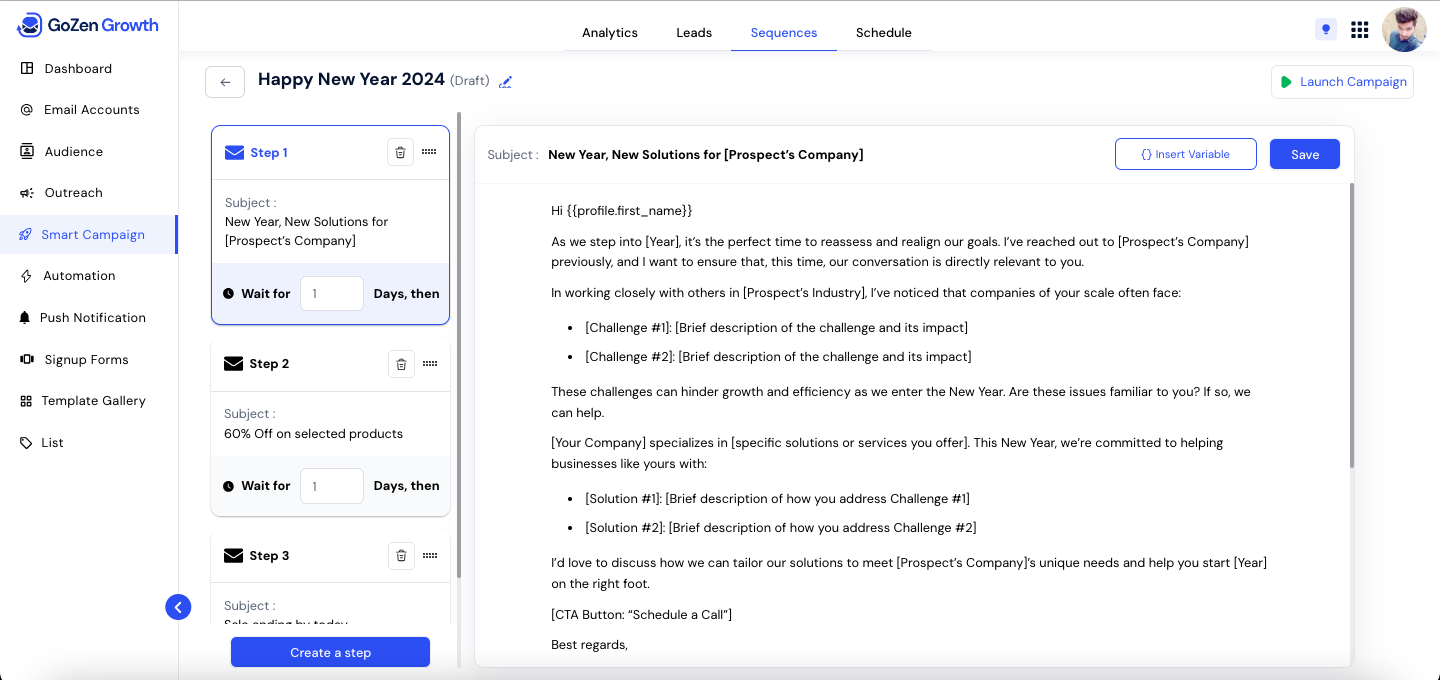
Editing Email Campaign Content
When the email is generated on the editor The campaign editor you can modify the subject line, body text, images, and any other elements of the email.
Make the necessary changes to the content to suit your requirements.
Once you are satisfied with the edits, save the changes.
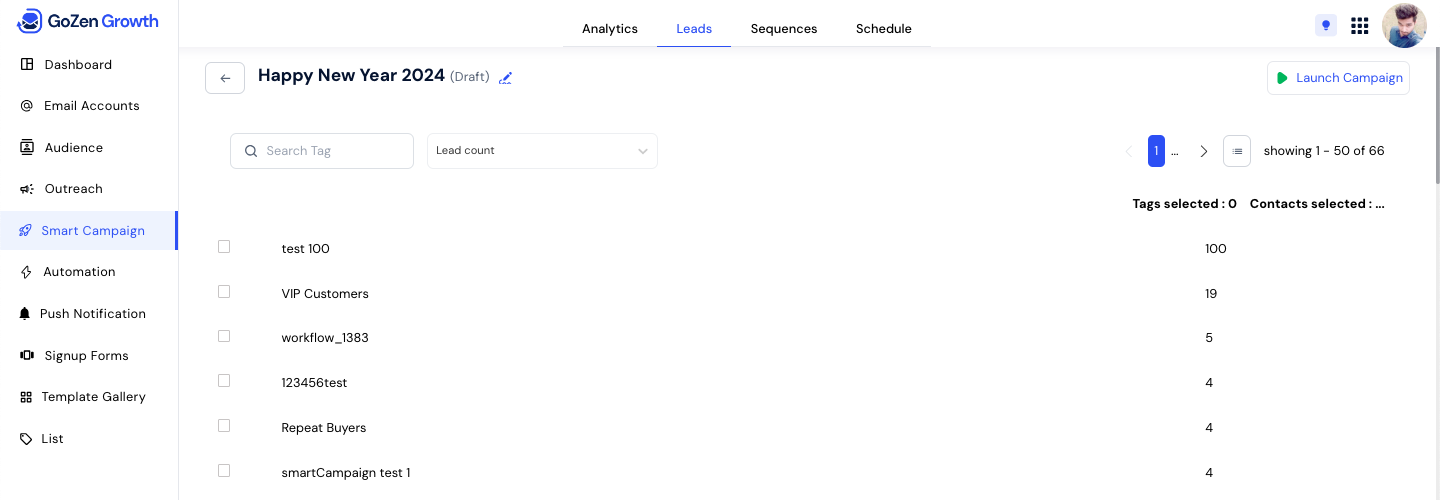
Selecting the Lead List
After editing the email campaign content, you need to select the lead list to send the campaign to. Follow these steps:
- In the campaign editor, navigate to the recipient section.
- Choose the lead list from the available options or create a new one if needed.
- Ensure that the selected lead list is relevant to the campaign's target audience.
- Save the changes to proceed.
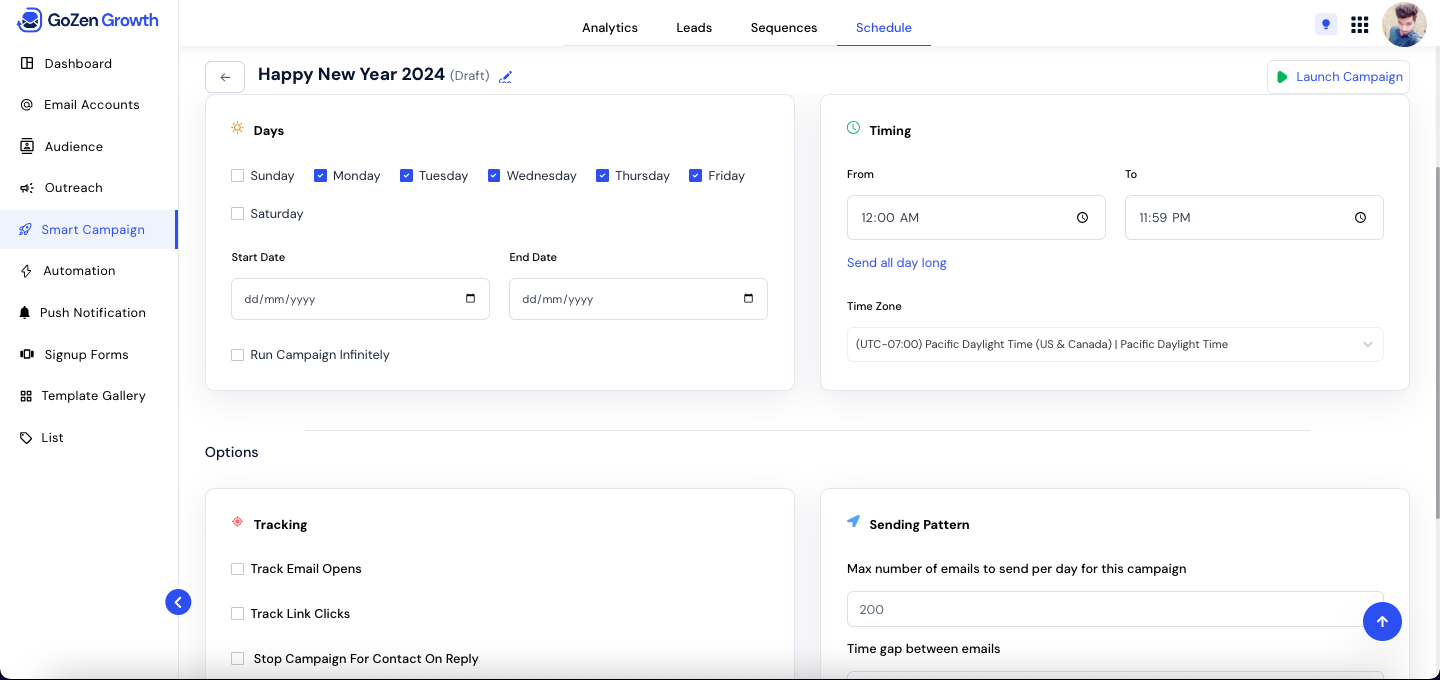
Scheduling the Campaign
To schedule the email campaign for sending, follow these steps:
- In the campaign editor, navigate to the scheduling section.
- Specify the preferred days, timings, and sending patterns for the campaign.
- Ensure that the schedule aligns with your target audience's preferences and time zones.
- Save the changes to proceed.
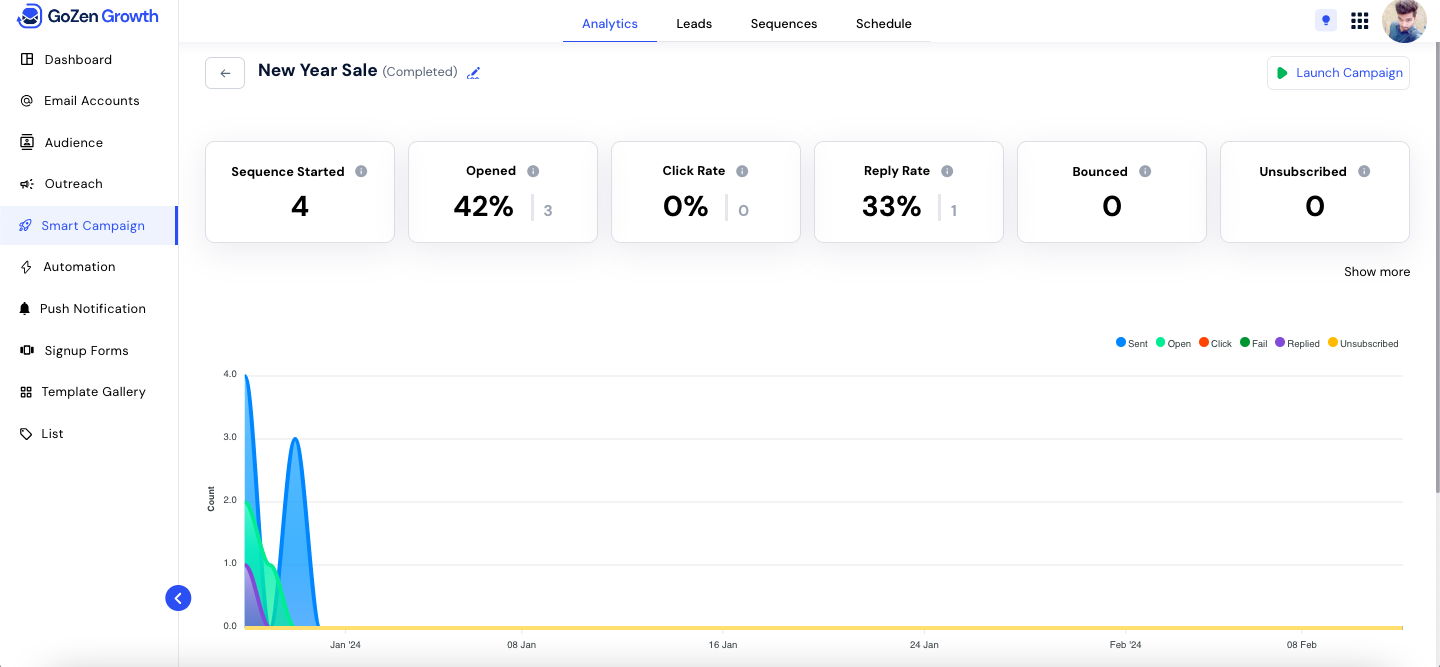
Tracking Campaign Performance
To track the performance of your email campaign, follow these steps:
- After sending the campaign, navigate to the campaign tracking section.
- Monitor key metrics such as open rates, click-through rates, and conversions.
- Analyze the data to gain insights into the effectiveness of your campaign.
- Make any necessary adjustments to future campaigns based on the performance analysis.
Last updated